How To Enable Night Mode To Reduce Screen Glare On Windows 11
A Beginner’s Guide
Did you know that staring at digital screens for long periods of time can strain your eyes and disrupt your sleep patterns? Computers possess a functionality that can assist with this issue. Night mode, also known as dark mode or night light, is a feature that reduces the blue light emitted by your device’s screen, making it easier for your eyes to adjust to surrounding lights, thus, causing less eye strain.
Here’s how you can enable night mode on Windows 11.
- Step 1: Open Settings. Click on the “Start” button (Windows logo) located at the bottom left corner of your screen. This will open the Start menu.

- Step 2: Access System Settings. Click on the “Settings” gear icon, which looks like a gearwheel. It’s located above the power button in the Start menu. This will open the Windows Settings window.

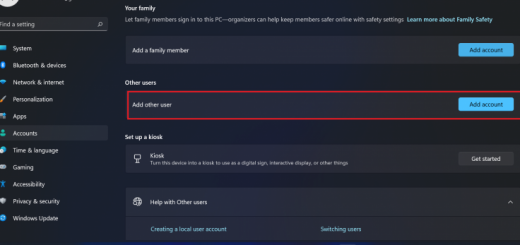
- Step 3: Navigate to Display Settings. In the Windows Settings window, click on “System” in the left sidebar.

- Step 4: Enable Night Light. Under the “Display” section, you’ll see the option for “Night Light.” Toggle the switch to turn on Night Light. You’ll notice that the screen color temperature will adjust, giving your screen a warmer tone.

- Step 5: Customize Night Light Settings (Optional). To customize Night Light settings, click on it and the options for customizing it will appear.


- Step 6: Adjust Night Light Intensity (Optional). In addition to the main Night Light settings, you can adjust its intensity using the brightness slider in the Action Center.

That’s it! By following these steps, you can enable Night Light on Windows 11, making your screen easier on the eyes during evening hours and promoting a more comfortable viewing experience.